My Blog List

Friday, June 18, 2010

Wedding Clip Part III

Finally, I finished the third clip of the wedding video. Exhausted... and I have two more to edit...


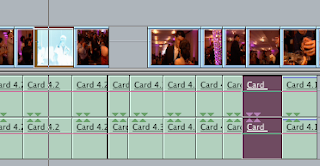
Some Tips about Wedding Videography

I have shot over 20 wedding ceremonies for friends. Here are some tips based on my experiences.
  • I personally prefer to use hand-held camcorders. Typically, a wedding shoot can last for up to 9 hours. Using light camcorders can save videographers a lot of energy. Morover, hand-held camcorders do not look as "official"as big ones, so the people being shot feel more comfortable. Thanks to HD technology, today's hand-hand camcorders have professional video quality as well.

  • Always have back-up mics and audio cables. I have encounted the situation where my wireless mic went down during shooting. What a disaster! Although it doesn't happen often, back-up mics and audio cables can save your life.

  • Have your tripod with you. I didn't take one with me when I shot the wedding in April because the tripods I was allowed to check out from school didn't come with cases. I didn't want to run the risk of the tripod being broken by those who checked in my luggage. But shooting without a tripod turned out to be an exhausting job.


Thursday, June 17, 2010

Recommending a Final Cut Pro Tutorial Site

I found a web site, which may be helpful to many student editors. It is called Final Cut Pro tips.


FCPtips tutors its viewers about how to use existing tools in Final Cut Pro to achieve effects similar to those that can be created using expensive plug-ins. For example, there is a clip on the site's main page that explains how to blur a person's wrinkles by adding several layers of Blur filters; so it's not necessary to buy skin-smoothing plug-ins.

Most tutorials are provided in the form of a video clip, which usually lasts 10 mins. There are several clips available to everyone, but you have to register online to gain full access to the website.

Wednesday, June 16, 2010

Line Video Clips Up with Audio Clips

I often messup the sequence I'm working on when editing. In most cases, the linked video and audio clips are not lined up with each other, which makes editing tough.
To line them up, simply click the clip in the sequence to highlight it. The video and audio clip will both highlight even if they are sepearted.


Click the Linked Selection button, which is on the right upper corner of the timeline.

Once the icon changes from green to gray, the video clip is no longer linked with the audio clip.


Then move the video or the audio clip manually to line them up. Finally, click the Linked Selection button again to re-link them.

Tuesday, June 15, 2010

Problem with Frozen Frames

When I was editing my friend's wedding clip, I froze some frames to make them look like still image. As usual, I double-clicked the clip containing the frame I wanted to "freeze." Then I placed the playhead over the frame so it was shown in the Canvas window.


Then, I went to the Modify tab and selected Make Freeze Frame. The frozen frame appeared in the Viewer window.


Finally, I dragged the frozen frame back into my sequence and performed Image Motion as I had before. I made four frozen images in total. The first three looked fine when I played back the sequence. But the fourth frame had some problems. Compared to the other three, it looked blurred in the Canvas window, and on the external monitor, I saw interlacing lines and flickers.


I checked again to make sure I performed the same effects on all four frames. I can't figure out the problem with the fourth image. Can anybody help me?

Full Circle Package

Here is the talk show package I produced last semester for my Studio Production class. I want to thank Pedro Falci, my fellow classmate, who hosted the show for me and interviewed John Holland, star of the BU men's basketball team. Hope you like it.

My Story about Yao Ming

In April, I flew down to Houston, TX to shoot my friend's wedding. Meanwhile, I needed an interviewee to finish a story for my Broadcast Sports Journalism class. I thought of Yao Ming, the center of the Houston Rockets, whom I have known for years. So, I called Yao and asked him if he could spare a few minutes to do the interview. Fortunately, I got a "yes."

In the story, Yao talked about his injury recovery, his eagerness for the upcoming birth of his first baby, and his contract negotiations with the Houston Rockets.


Here is the story...

Monday, June 14, 2010

How to Covnvert Video Formats

Many video clips downloaded are in the MPEG2 format and Final Cut will not be able to use them until they are converted to a compatible format first.

VisualHub is an ideal video converter program. It is compatible with a range of video formats, including iPod, PSP, DV, DVD, Tivo, AVI, MP4, WMV, MPEG and FLV.


To convert a video in MPEG2 format, for example, simply drag it onto VisualHub. Then select the DV tab. Be sure to select the Ready for Final Cut check box, and click the Start button.


The conversion time will depend on file size and format. VisualHub will convert a typical 5 min MPEG2 clip to DV format in one minuter and a half.

Does the SmoothCam Filter work?

When I was shooting my friend's wedding in April, I tried to create some "dolly effect" shots. Some of them were successful, but others were too bumpy. So, according to the suggestion of Chris Mello, my fellow classmate, I tried to fix these shots with the SmoothCam Filter.

The SmoothCam Filter can be easily found under the Video folder in the Effects tab of the Browser.


I dragged the SmoothCam filter and dropped it onto the clip I wanted to fix. Then a window popped up, saying the clip was being analyzed.


However, the outcome turned out to be disappointing. The clip didn't seem to be "smoother" as I had expected, but rather, it looked more shaky.

I talked with Chris about this problem. The conclusion we came to, although we are not sure, is that I had performed slow motion on the same clip I planned to fix before the SmoothCam Filter was applied, which could cause the failure of the SmoothCam.

Has anyone encountered the same problem before? Any suggestions or comments will be welcome.

Wedding Clip Part II

In the second clip of the wedding video. friends of the bride and groom show a film they made in honor of the newlyweds. They also sing a song to celebrate the event, which moves the couple to tears.


Record Voice-over in Final Cut Pro

I used to record my voice-over on tape and then import it into Final Cut until Jake Kassen, the engineer at my school's editing lab, told me there was no need for the extra step and I could record into Final Cut directly. I find that using Final Cut to record voice-over saves me a lot of time.

To record directly, you need your Mac, an audio board, a USB audio interface, and a hand mic.

First, hook them up: hand mic=>audio board=>USB audio interface=>Mac
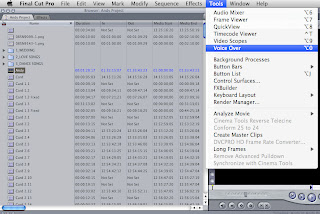
Then, choose Voice Over, which is in the Tools menu.


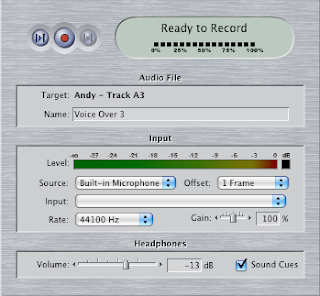
Next, choose the audio interface input your microphone is connected to from the Input pop-up menu, as well as the sample rate that matches your sequence sample rate.


Then, select the sequence to which you want to add voice-over. Remember to set In and Out points, which is very important, or Final Cut won't record.

Finally, click the red "record" button on the Voice-Over window and you will have a five second countdown before the recording starts. Once you finish recording, just hit the space bar to stop.


Friday, June 11, 2010

Converting Footage from 16:9 to 4:3 in Final Cut Pro

I encountered a problem with aspect ratio when doing a project last semester. The project was supposed to be in 4:3, but I had some footage in 16:9. How to convert the footage from 16:9 to 4:3 confused me for some time. But it turned out to be an easy job in Final Cut.

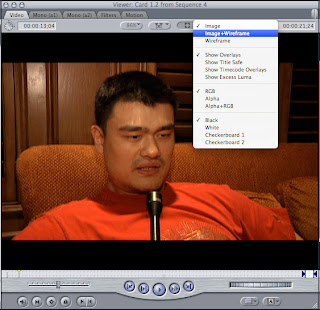
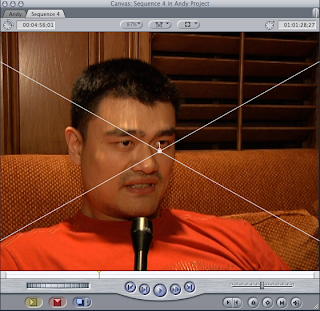
First, as usual, double click the video clip that you want to alter in your sequence and it will be shown in the Canvas window. Then click the button in the Canvas indicated below, and select Image+Wireframe mode.


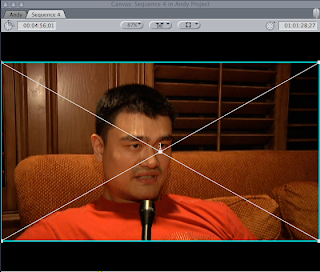
Now there will be handles attached to the clip that allow you to perform different geometrical manipulations. See image below.


Simply drag the edges or the corners to scale proportionally.


Congratulations! You get the 4:3 footage!

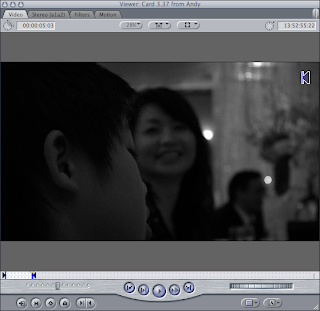
An easy way to make video clips black and white in FCP

Many video makers like to use black-and-white in post production, and it's easy to apply in Final Cut Pro.

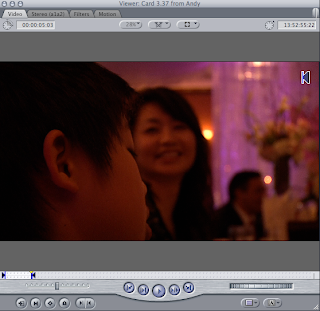
First, double click the clip that you want to change to black-and-white and make sure you can see it in the Viewer.


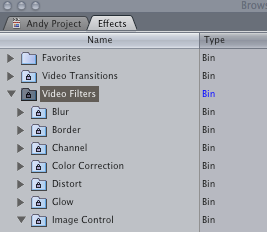
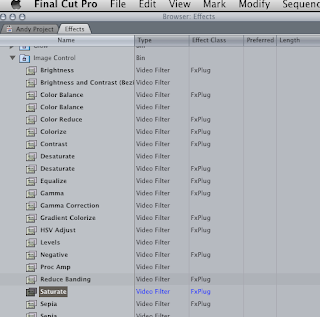
Then, find the Effects tab in the Browser. Click the Video Filter bin, in which you can see the Image Control bin.


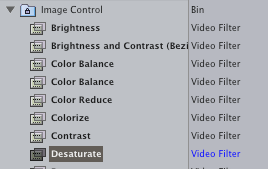
Click it and find the Desaturate filter. Then drag the Desaturate filter and drop it onto the Viewer.


And DONE~~~~

Thursday, June 10, 2010

Bad DV Tapes Ruin Your Work

DV camcorders are popular with student video makers because they are cheaper than camcorders with storage capability, such as memory cards or blue-ray discs.

A lot of events people shoot are on a one-time basis and there is no chance to reshoot. In this case, high quality DV tapes make sense. Although they may cost more, there are likely to be much fewer errors on these tapes than on the cheaper ones. My friend Seth encountered this problem when he was shooting an important interview with the head coach of BU's men's basketball team. He purchased an off-name brand tape at a local CVS and the video he got turned out to be totally unusable.

The engineering staff at BU's editing lab strongly recommend that students avoid buying Radio Shack DV tapes, Fuji DV tapes or other off-brand tapes.


Wednesday, June 9, 2010

External Hard Drive for Final Cut Pro

I recently switched the external hard drive I use for edting. My old one was a Western Digital My Passport Essential 500 GB USB 2.0, which I ordered in March. I purchased this one because it's super portable and many student editors use it. It worked fine when I edited in standard definition, but when it comes to high definition, that's another story. I often encountered the problem of dropped frames when using it do to HD editing. According to the engineer at my school's editing lab, the problem was caused by the slow transfer rate of the USB. He recommended that I purchase an external hard drive with an eSATA. I didn't plan to do so, because the WD hard drive had just arrived. But as dropped frames ocurred again and again, I changed my mind.

I followered the engineer's recommendation and ordered a Seagate FreeAgent XTreme 640 GB USB 2.0/FireWire 400/eSATA Desktop External Hard Drive on Amazon. Although this item was only rated 3.5 on a 5 scale, it has worked well with my editing so far. I have encountered fewer dropped frames, and compared to other desk top hard drives, it's more compact.

Tuesday, June 8, 2010

Wedding Clip Part I

I flew down to Houston, TX in April to shoot my friend's wedding. I have known Andy, the groom, for years and the video is a wedding gift for him.

I didn't start editing until I had a short break in early May. I just finished Part I of the video and want to show it to you guys. I know the new couple has been waiting for the clip for some time. Hey Andy, hope you like the footage and congratulations again.

To all the viewers: any suggestions or comments about shooting or editing will be appreciated.

Super Easy Ways to Perform Color Correction

There are a lot of ways to perform color correction in Final Cut Pro. Here are two easy ways I often take.

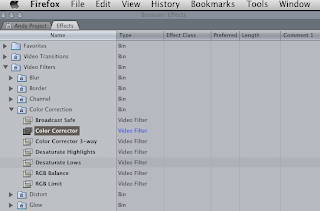
The first way is to use the Color Corrector filter, which is in the Color Correction bin, within the Video Filter bin in the Effects tab in the Browser. All you need to do is drag the Color Corrector filter and drop it onto the clip you want to change in your sequence. This method works when you know exactly what changes you want to make.


The other method I often use is using the filters in the Image Control bin within the Video Filter bin, including the Brightness filter, Contrast filter and Saturation filter. This method works if you are not sure what color you really want and simply want to enhance the quality of your footage.


One thing to remember: it takes longer to render using the second way than using the first.

Monday, June 7, 2010

Something about Panasonic AG-HMC150

I have only filmed with an AG-HMC150 twice, and here are my thoughts about this camcorder.

To begin with, the AG-HMC150 is super light. Because this camcorder doesn't use a tape transport, it is only around 3.7lb (according to its manual). This lightness is good for videographers who need to shoot all day long. I filmed my friend's wedding day from 9:00am to 11:pm, but didn't feel as tired as I have in the past, when shooting other weddings using different cameras.

In addition, I'm impressed with the HMC150's performance in low-light conditions. The ballroom where I shot the wedding was really dark, but the video quality I got was not too bad. Although I could see noise spots on the picture, especially after enhancing the contrast and brightness in Final Cut, the noise level was still superior to other cameras.

The only problem is the HMC150's LCD monitor, which is in standard definition. It was really difficult to adjust the focus based on the LCD monitor's grainy images in normal light conditions, not to mention in low-light conditions!

Sunday, June 6, 2010

A Using Problem about Panasonic AG-HMC150

I used a Panasonic AG-HMC150 to shoot a wedding for my friend in April. It was the first time I used this type of camcorder, which uses an SDHC memory card for media storage. I purchased two Sandisk 8GB SDHC Class 6 cards (in addition, I borrowed one from my friend). Each card can store around 43 minutes of footage in the highest video quality. But that was not enough for the day-long shoot and I had to transfer the data from the memory cards to my hard drive so that I could continue shooting.

I encountered a problem during the wedding shoot. When I tried to transfer the data from the memory card, the system told me that some files were corrupted and the transfer couldn't be completed. It really drove me crazy: I had to use the other two cards to shoot and tranferred data as long as I was able to.

I talked with the engineer of our school's editing lab about this issue. I was reminded by him that I had tried to delete a test clip on the card during the shoot, which can cause file corruption. He strongly recommended not using the camcorder to delete data from the card, although according to the manual, you are allowed to do so. Another suggestion he gave me is not to use the memory card again, since no one is sure if the card caused the problem.

Wednesday, June 2, 2010

Why I'm Creating This Blog

My name is Yuming Wang , a TV student at Boston University. I want to explain why I've created my new blog: Yuming's Video Production.

I have encountered many problems during my learning process as a videographer. When I started editing, and sometimes even today, I find myself trying to creat a specifc video effect without any idea how to do so. I go online, in the hope that I can find an easy-to-use source that will provide me with the answer. What I usally find, however, are lengthy, time consuming articles on video making that seldom provide me with the answer to my question, or extensive video clips I don't have the patience to watch. It was so frustrating (that's why I use the pic, in which you see a statue holding his head).

Then the idea of creating a blog, on which people can find brief, specific, and easily applied answers to their video-making questions, came out. This blog is for those who really have passion for video production, but are still in the learning stages (including me). I hope my viewers can find satisfying answers to their questions not matter how rudimentary the questions are. Sometimes, I will post a video clip produced by myself and encourage recommendations and suggestions from the viewers. I will post my confusion about video production on my blog as well, eager for answers from some experienced video makers. Of course, I will offer tips about editing and shooting based on my own experiences in video production.